White and Wood Banister Makeover: ’80s Staircase gets Update
We may earn money from the companies mentioned in this post.
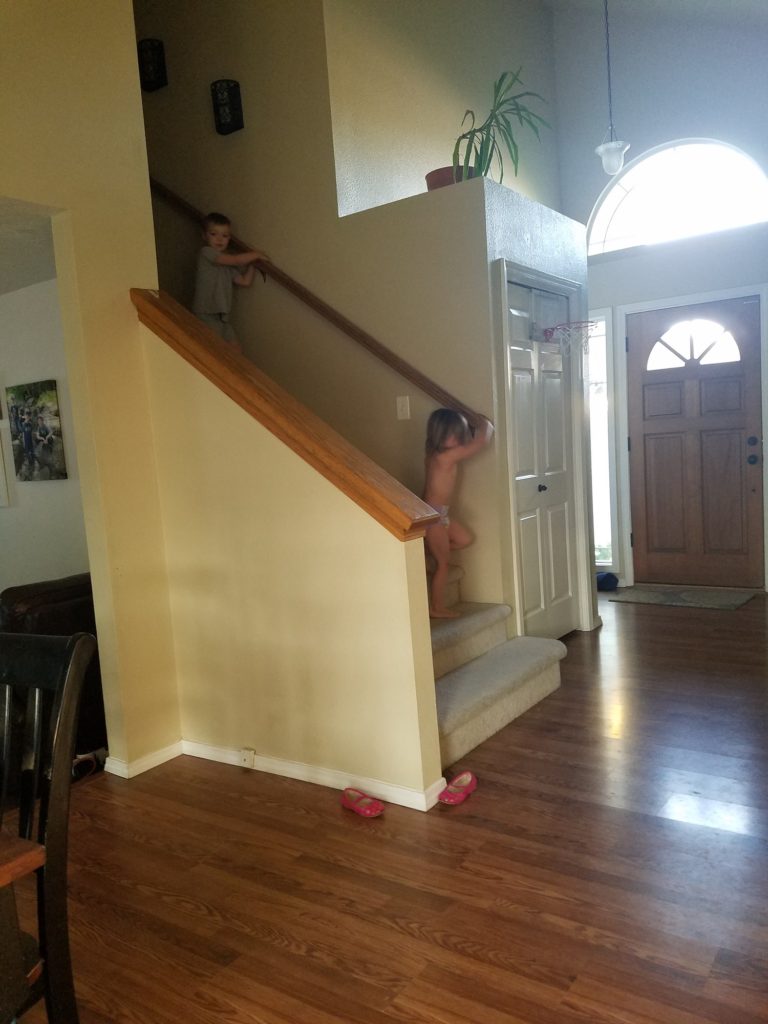
Aside from the naked toddler heading down it, this stairway needed a big change. Makeover time! With visions of a white and wood banister dancing in my head–thanks, Pinterest–I asked my husband, “How ’bout it?”
Still a little war-weary from the last project I asked him to complete, he asked if I was sure, ‘cuz there’s no going back. And with an enthusiastic high five, we embarked on yet another remodeling project for ’20: the ’80s staircase makeover.
Remodeling a stairway with a white and wood banister
Here’s what we were working with; a 1980s golden oak pony wall. Not hideous ugly, just outdated and closed off. And blah.
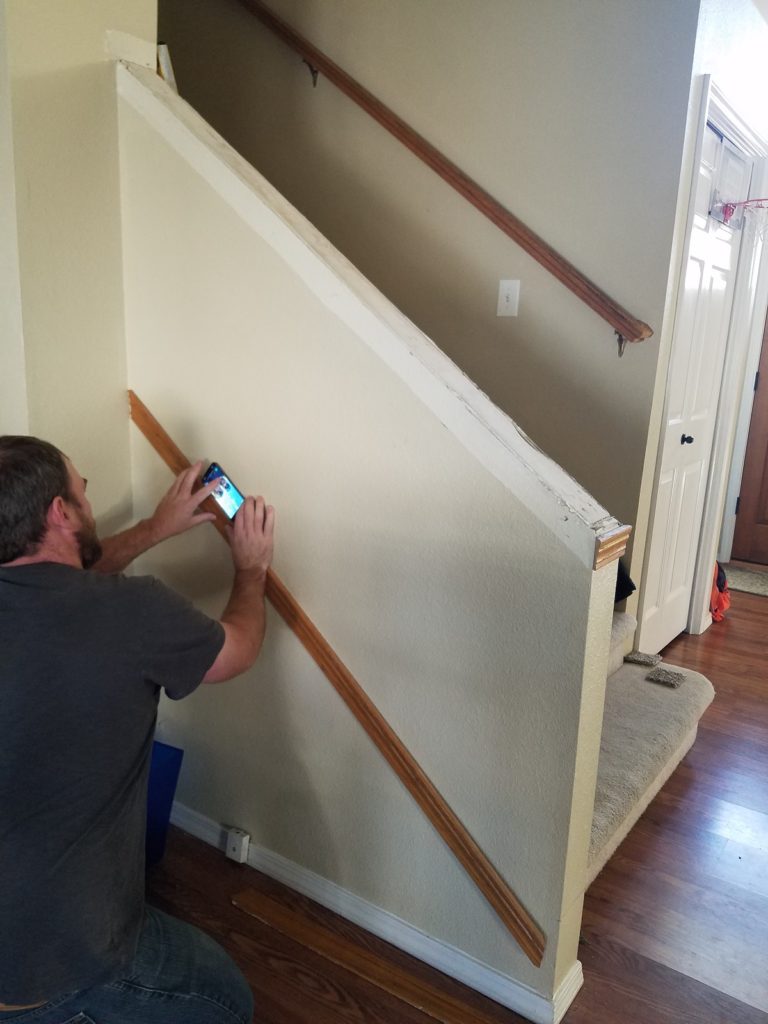
1. Take down that ’80s staircase wall

It was surprisingly easy to lift the top of the pony wall up and off. At least that’s what I was told. The oak trim came off with a little prying with a flathead screwdriver. We reused this trim under the new base of the banister, so we were careful not to break it.
Caleb made some measurements to get the same angle in the remodeled banister. Did you know there’s a level app? Then he drew a line between the measurements and ensured the angle was the same as before 36 degrees. The Spruce’s summarized measurement requirements could be handy if you don’t have a reference to go by; for example, if you’re tearing down a full wall.

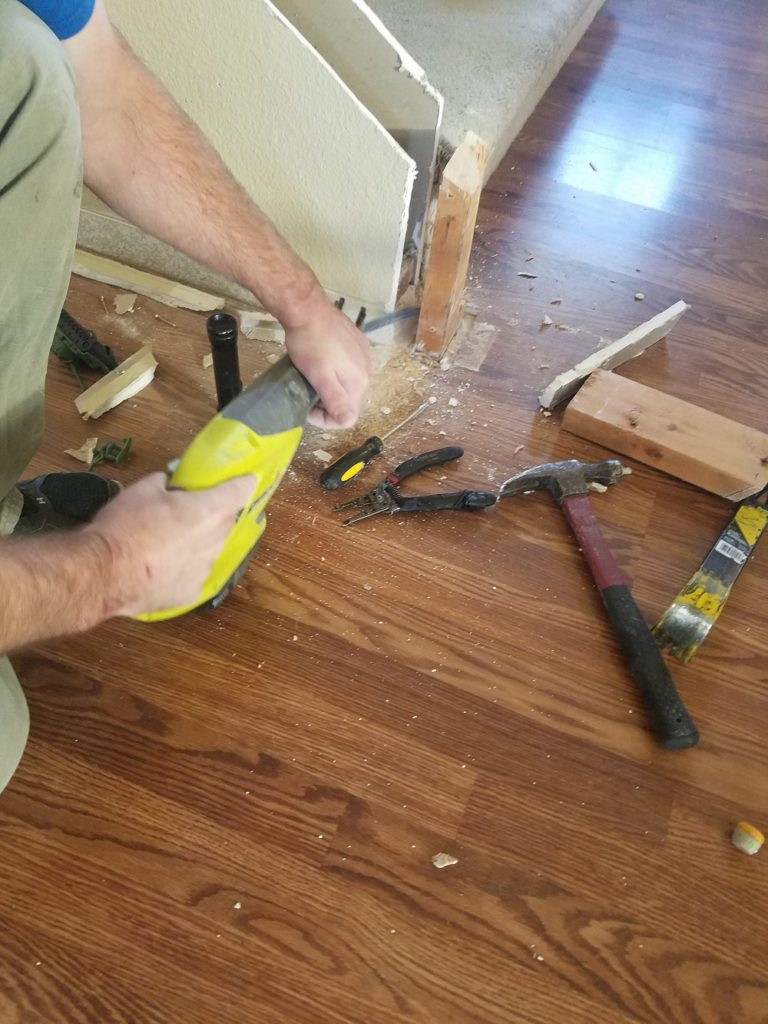
He cut through the wall with his Sawzall. It wasn’t the smoothest cut, but we worked with what we had.

2. Repair the wall that was taken out
At this point, we switched gears and to start repairs on the wall. Good thing we live a block away from Lowes! Caleb picked up this corner bead that strengthens the corners when framing.
He salvaged some drywall and nailed it into the rectangular area that was taken out with the pony wall. Then, he used joint compound and mesh joint tape to fill the cracks. He tried paper joint tape but had to rip it down because it was visible on the final wall.

Back to Lowe’s for a $13 can of mud spray. A few coats on the medium setting made the wall texture match the surrounding wall. Then a couple of coats of paint made our wall look like it was always that way.
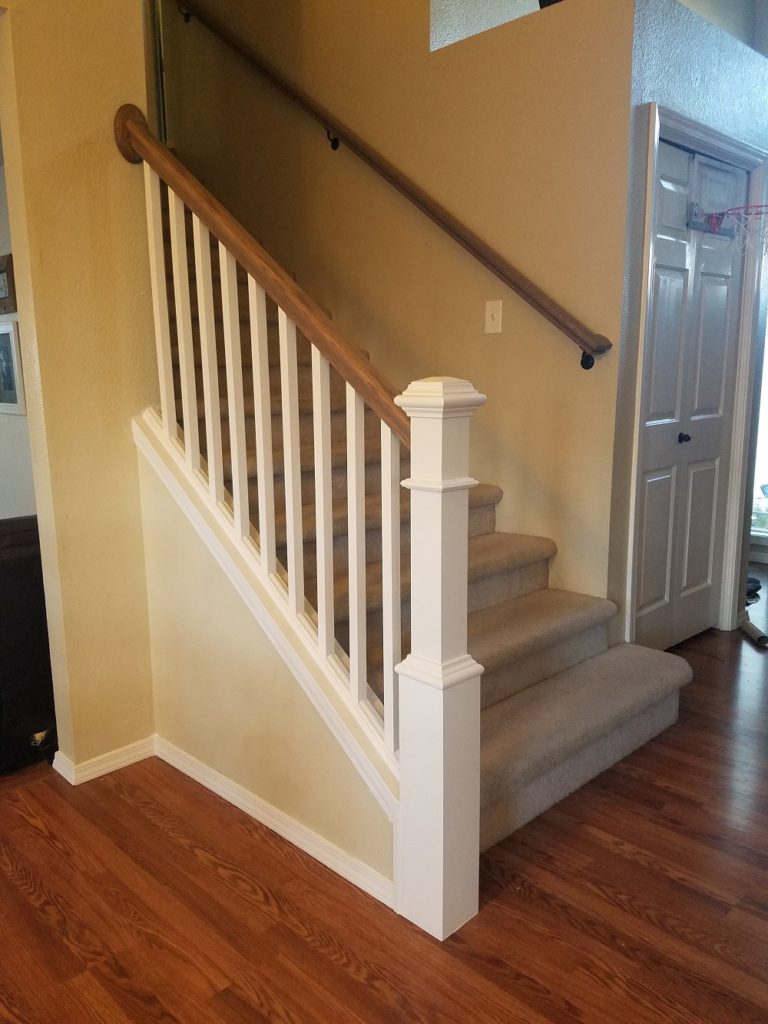
3. A white and wood banister needs a newel post
Next comes the most exciting, yet daunting part: the newel post. Duh duh DUH.
We found the perfect one at…wait for it…Lowe’s.
Our perfect newel post came with the perfect price–$82 plus my military discount. I love how Lowe’s gives a military discount on almost everything. We found out the hard way that Home Depot picks and chooses what to discount. Here’s our newel on the Lowe’s website.

The poor reviews seem to be a mix of two things: the square part on the very top is removable with no invisible way to fasten it. We used foaming Gorilla glue for this. Secondly, they apparently sometimes arrive damaged via shipping. We actually picked ours up in-store so cannot comment on delivery. But I find most stores easily accept returns if a damaged shipment happens.
Update: It looks like Lowe’s doesn’t sell it anymore. Here’s a similar one on Amazon, though it looks like you’ll need to purchase a separate installation block/kit if needed.
The Lowe’s newel post came with an installation block hidden inside (the white part then slides over it) to secure it to the substrate. Caleb went below the house and found that the pony wall had a double 2×4 block that was already secured underneath the house. Score! So he cut off one of the 2x4s and made the second 2×4 the same size as the installation block. So instead of the installation block, we used the 2×4 which we already had, which was already secured below the house.
While securing the installation block to the framing below the house will be the most secure method, they also sell installation kits for folks who don’t have this option.
After sliding the first newel piece over the base wood, Caleb used the screws that came with the post to secure it. Then the final outer piece of the newel slides over that to hide the screws.
Notice how just a portion of missing flooring is visible here. We added a piece of flooring we had left over. It’s such a small area, that we probably could’ve used stained wood filler.
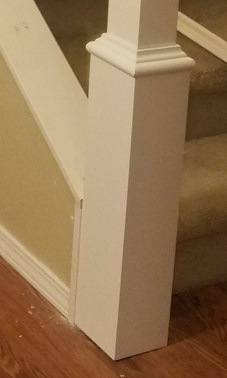
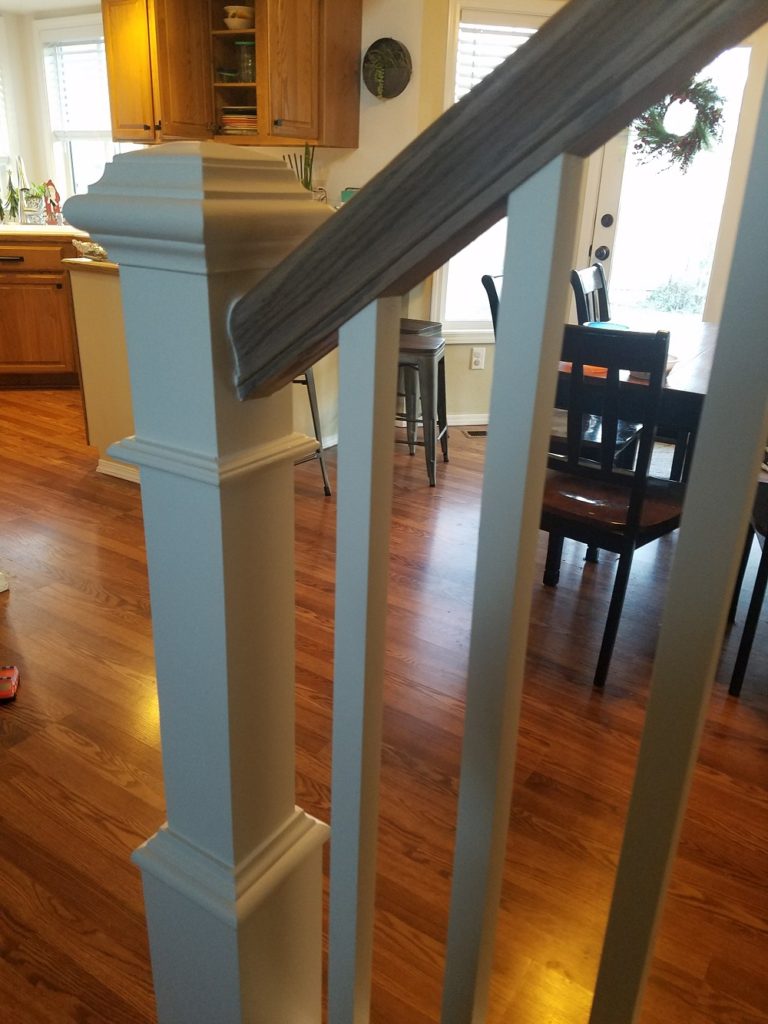
Our newel overlapped the wall a bit once the trim was added, so we made it look more intentional by taking the trim all the way down the post. You can see this in later pics.
3. Add trim pieces
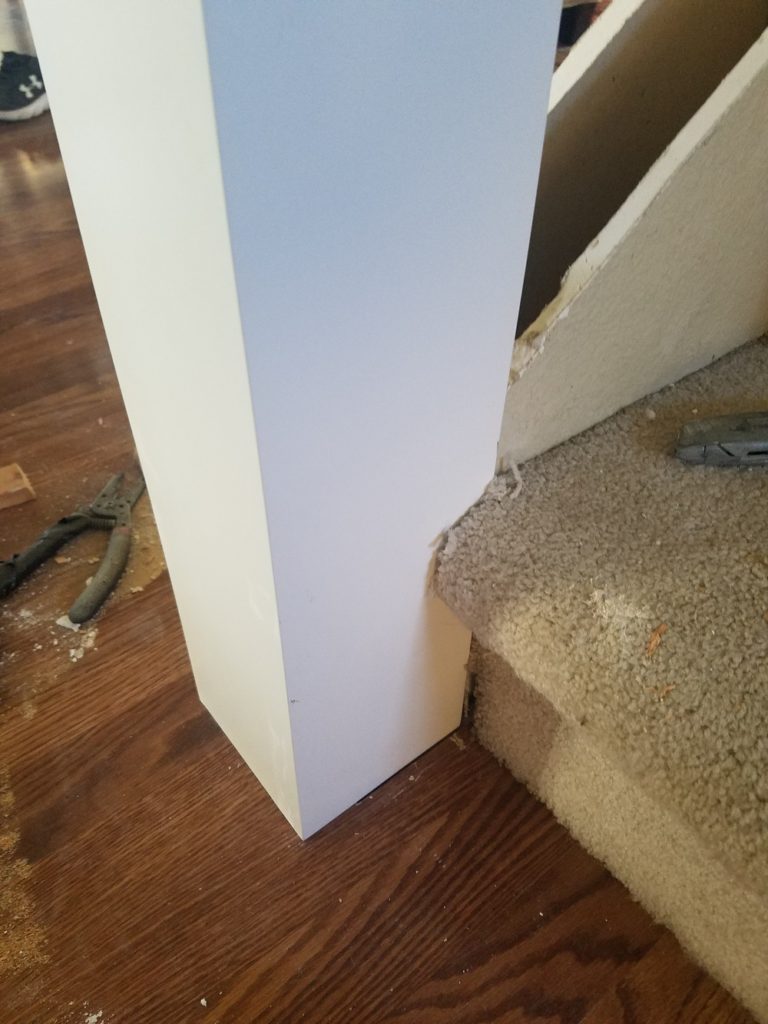
We bought an MDF piece to use as the base of the banister. It overlaps the newel post a bit because we wanted to make sure we had room for trim underneath. We actually had to sand down the trim slightly anyway to make it fit. Caleb nailed the board down to the exposed studs.
We nailed on the sanded, primed trim with bradley nails, then caulked all edges. Caulk was our friend with this project! See how the bottom of the post isn’t perfectly lined up with our floor? The post is perfectly level, but we have a slight slant on our floor there. Caulk.
We weren’t sure how to blend the slightly wider MDF into the post, so we let it overhang a bit and added more MDF to line the post down to the floor to make it look intentional. In hindsight, we should’ve sanded the edges and made it align perfectly with the newel post. The finished piece–after caulked, of course–turned out better than we expected. It’s not quite finished in this pic.
We then nailed the shoe rail to the MDF and started the daunting task of deciding where the balusters would go. Code says no more than 4 inches apart. Ours are 3.75 inches. You’ll have to do some math here to decide where to put yours to make the first and last gaps relatively even.
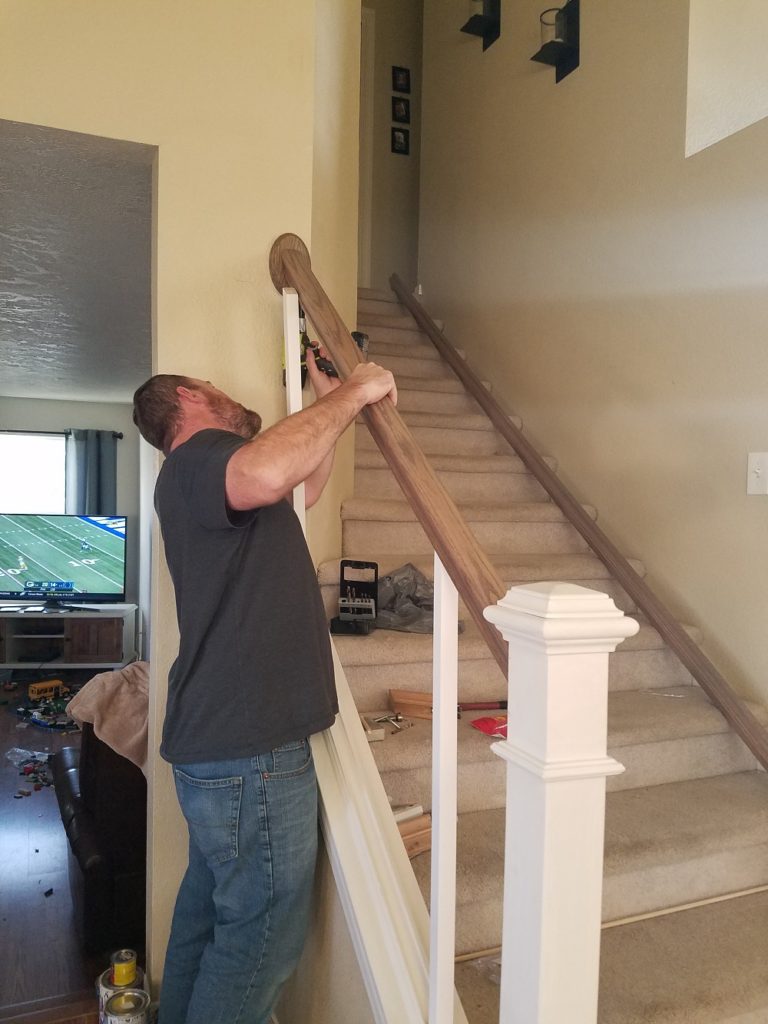
4. Add the railing to see the white and wood banister take shape
Ok, this part was exciting too. You really see it take shape here!
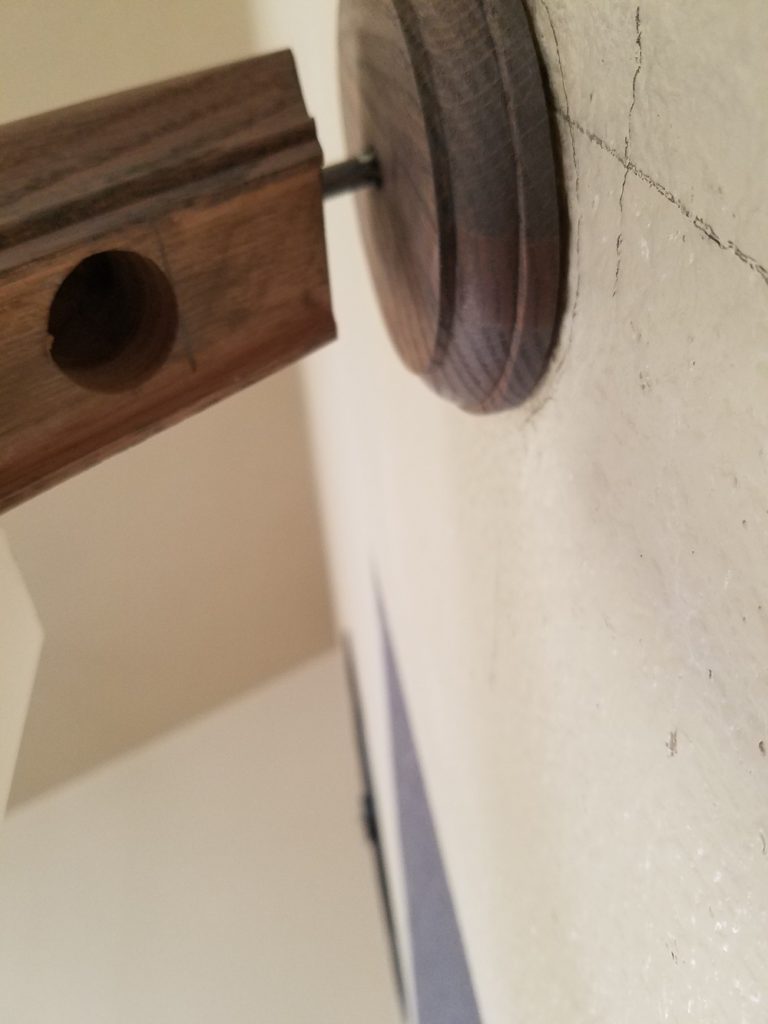
We didn’t originally want a rosette (that small decorative oval on the wall), but Caleb overcut the rail slightly, and we didn’t want to spring for a new rail. Measure twice, and cut once, right? Meh, that’s for suckers. He matched the height of the railing to the height of the opposite wall railing. He then marked the center spot on the newel post as well as the spot he’d drill on the wall. And of course, he made sure everything was level, and the rail was 36 degrees.
We originally bought this cool zip bolt to make the top wall installation “easier”. It was very difficult to get perfect, and we ended up giving up and just using lag bolts on both sides. Section 3 on this website gives a nice view of what this looks like. The top bolt angle was trickier, and the hole Caleb made with his drill bit (originally for the zip bolt) made it just within reach. Here’s what the underneath looks like. Never mind those pencil marks everywhere.
For the color, we sanded down the railing and used two coats of classic gray stain from Minwax, and one coat of a leftover red mahogany Minwax stain. The red mahogany gave it just a touch of warmth that the classic gray was missing, but the gray was still pretty on its own.
5. Add balusters for your white and wood banister makeover
If you thought the railing was exciting, boy oh boy will you love this. The balusters are the icing on the cake! And let’s face it, they mean you’re almost done.
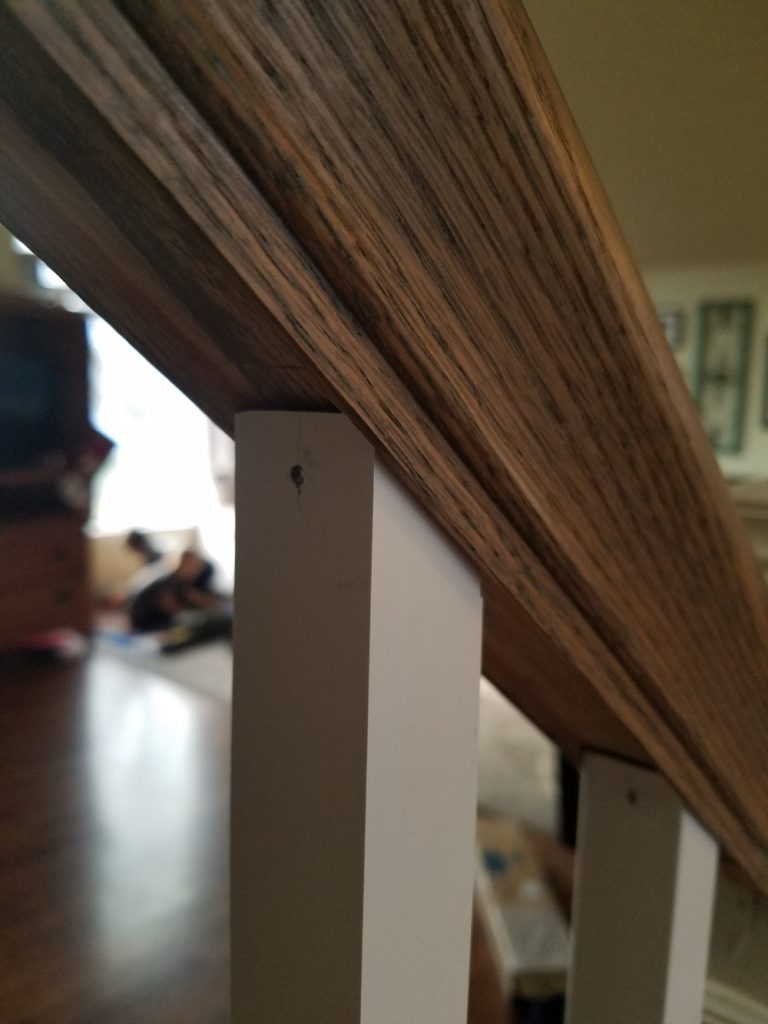
It looks like some people choose to just glue these in, but we glued and nailed ours in with brad nails. Then we just covered them with the shoe rail filler and handrail filler that came with the railing. This pic is taken before the filler was added. You’d think they’d try to jerk around when you nail them, but it wasn’t an issue with the glue and a firm hold.
We used liquid nails to hold the handrail filler in place, plus vice grips until the glue dried.
6. Painting. Lots of painting. So. Much. Painting.
Everything was so fun and exciting lately. But…then comes the painting. Wah waah.
And more painting.
We bought a primed newel and balusters, and I added two coats of off-white paint. I couldn’t find definitive info on whether or not I should seal the newel post, so I did add two coats of poly for good measure. Couldn’t hurt, right?
I have three boys, after all.
I also added some caulk to the area where the rail meets the newel post, because–hey, nobody’s perfect.
7. Don’t forget the opposite rail and hardware
I thought we might buy a new opposite rail until I saw the $100+ price for that long length. Whaaaa? I took that 1980s bad boy down and sanded it with my awesome sheet sander. Then I added two coats of gray classic Minwax and one coat of red mahogany stain by Minwax to give it some warmth. I gave it three coats of Minwax sealer to protect against grubby hands. I read somewhere that after the third coat of sealant, there’s not much more benefit. We’ll see.
Update: holding up great two years later!
The hardware for the opposite rail was blah! I donated them to Habitat for Humanity and bought new black matte hardware at…LOWE’S. By the way, this post is not sponsored by Lowes, though I WISH IT were.
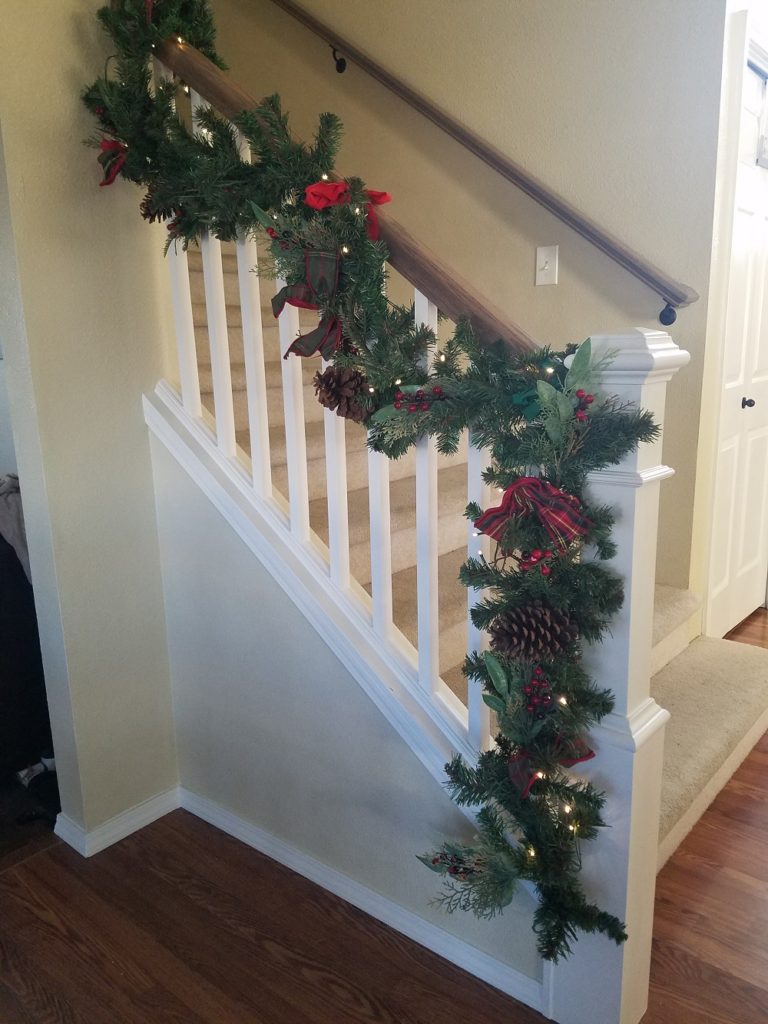
Just in time for Christmas garland. A $9 clearance find from Lowe’s, of course.
Whatd’ya think of the white and wood banister look?
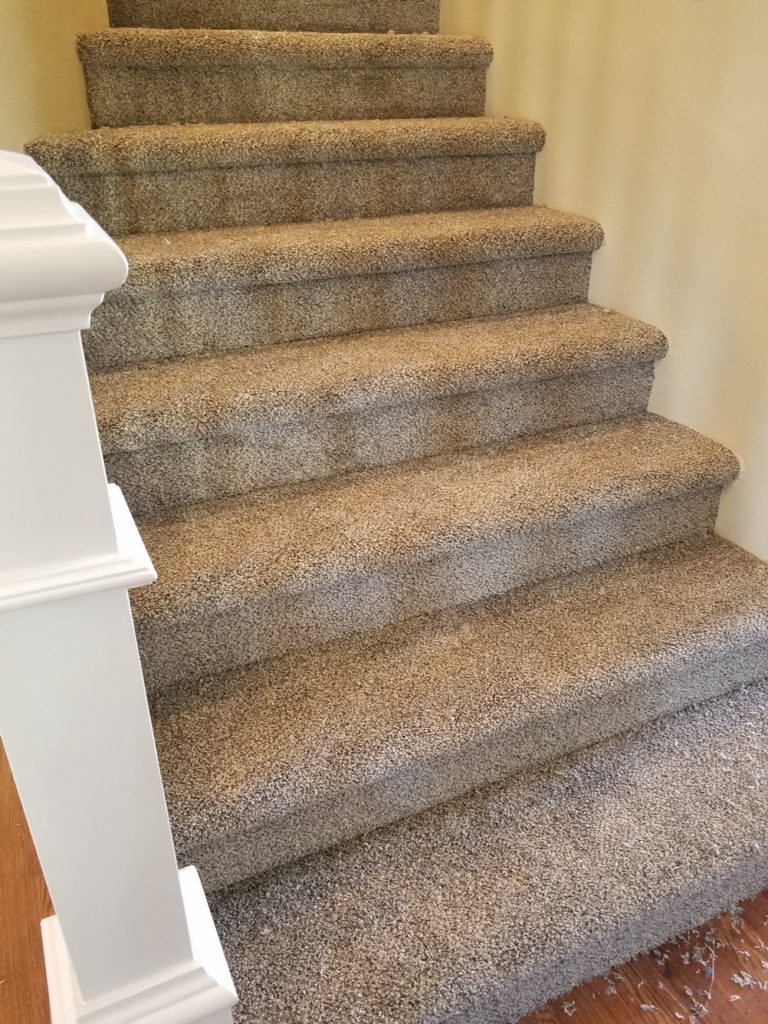
2/17/21 update:
We just installed a NEW grayish carpet from Lowe’s to replace the early ’90s ivory carpet! I took the picture before I even vacuumed it off because I was so excited. While I’d love a wooden staircase, it’s just not practical with three little boys who like to run around in socks and trip over their own feet.